
Make an easy apple stamped jack-o-lantern craft with orange paint and markers! A fun Halloween art activity for preschoolers and kindergarteners.

Apple Stamped Jack-O-Lantern Craft for Kids
This apple stamped jack-o-lantern craft is a fun and easy Halloween art activity for preschoolers and kindergarteners! Using a small apple, orange paint, and a few markers, kids can create adorable little jack-o-lanterns with silly, spooky, and completely unique faces.
If you’re looking for an inexpensive Halloween craft that doesn’t require a printable template or a long list of supplies, this one is perfect!
I love activities that give kids plenty of room to be creative, and this simple apple stamping craft does exactly that. Each pumpkin turns out a little differently, and adding the jack-o-lantern faces is half the fun.
It’s a great choice for classroom Halloween parties, preschool art centers, or a fun afternoon of crafting at home.
And, if you’re looking for even more festive ideas, don’t miss our collection of Halloween crafts and activities for kids. It’s packed with easy, hands-on Halloween projects that are perfect for little learners.
Easy Apple Stamped Jack-O-Lantern Craft

One of my favorite things about this Halloween craft is that it uses an everyday item in a completely different way.
Instead of eating an apple, we’re using it as a stamp!
When you dip a cut apple into orange paint and press it onto paper, it creates a surprisingly convincing little pumpkin shape.
Once the paint dries, kids can use markers to transform their pumpkins into jack-o-lanterns by adding eyes, noses, mouths, stems, and curly green vines.
Some pumpkins might look happy, others might look surprised, and a few might even look a little spooky!
The best part? No two pumpkins will look exactly alike.
The imperfect stamped edges, uneven paint coverage, and hand-drawn faces are what make this activity so much fun.
Why We Love This Halloween Craft
There are so many reasons to add this apple stamping activity to your Halloween plans!
- 🎃 Easy to prepare: You only need a handful of inexpensive supplies.
- 🍎 Fun stamping technique: Kids love using an apple as an unexpected painting tool.
- ✂️ No complicated cutting: Perfect for younger children who aren’t ready for scissors.
- 🎨 Encourages creativity: Every child can design their own jack-o-lantern faces.
- ✋ Builds fine motor skills: Stamping, gripping, and drawing all help develop hand control.
- 🏫 Classroom friendly: Easy to adapt for small groups, art centers, or Halloween parties.
- 😊 Each one is unique: Kids can experiment with different expressions and pumpkin designs.
This is also a wonderful alternative to traditional pumpkin carving for younger children who want to make their own jack-o-lanterns.
Supplies You’ll Need
You only need a few basic craft supplies to make this adorable apple stamped jack-o-lantern craft.
- Small apple: A smaller apple creates the perfect little pumpkin shape. You’ll cut it in half to make your stamp.
- Orange washable tempera paint: We used orange paint to create our pumpkin prints.
- White cardstock: I recommend cardstock instead of regular printer paper because it holds up better to wet paint.
- Paper plate or shallow paint tray: For dipping the apple into the paint.
- Black marker: For drawing funny, spooky, or silly jack-o-lantern faces.
- Green marker: For adding pumpkin stems and curly vines.
- Paper towels: Handy for wiping up paint and little messes.
My tip: Washable tempera paint is my favorite choice for preschool crafts because it’s easy to work with and generally much easier to clean up than acrylic paint.
For classrooms, I also recommend covering the work surface with a reusable craft mat or disposable table covering before getting started.
How to Make an Apple Stamped Jack-O-Lantern Craft
Ready to make your own little pumpkin patch?
Follow these simple steps to create this easy Halloween apple stamping craft.
Step 1: Prepare Your Apple Stamp
Start by having an adult cut a small apple in half from top to bottom, through the stem.
This creates two apple halves that can be used as stamps.
Gently pat the cut surfaces dry with a paper towel to remove excess moisture. This helps the paint stick to the apple.
Next, squeeze a small amount of orange washable tempera paint onto a paper plate.
Spread it out slightly so there’s enough room to dip the apple into the paint.
Helpful tip: Choose an apple that’s small enough for little hands to grip comfortably. You can also insert a craft stick into the rounded side of the apple to create a handle, with adult help.
Step 2: Stamp Your Pumpkin Shapes

Dip the cut side of the apple into the orange paint, making sure the surface is evenly coated.
Then, gently press the painted apple onto a sheet of white cardstock.
Lift it straight up to reveal your first pumpkin!
Continue stamping until you’ve created several pumpkin shapes across the page.
We made six pumpkins, but kids can make as many or as few as they’d like.
Encourage children to leave a little space between their stamps so there’s room to add stems and vines later.
Don’t worry if some prints are missing paint or have uneven edges.
Those little imperfections give each pumpkin its own personality!
Step 3: Let the Paint Dry
Once all the pumpkin shapes have been stamped, set the cardstock aside to dry completely.
Drying time will depend on how much paint was used.
This is a great opportunity to read a Halloween picture book, practice a little pumpkin counting, or work on another seasonal activity.
For example, our Halloween alphabet matching game is a fun way to sneak in some early literacy practice while waiting for the paint to dry.
Step 4: Draw Your Jack-O-Lantern Faces

Once the orange paint is completely dry, it’s time for my favorite part!
Give children a black marker and invite them to turn each pumpkin stamp into a jack-o-lantern.
They can draw:
- Triangle eyes
- Big round eyes
- Silly smiles
- Toothless grins
- Spooky mouths
- Surprised expressions
- Funny little noses
Encourage kids to experiment with different facial expressions instead of making every pumpkin look the same.
One pumpkin might be happy, another might be surprised, and another might have a big toothy grin!
For younger preschoolers, you can demonstrate a few simple face shapes on a separate sheet of paper before they begin.
But I recommend letting children draw their own faces as independently as possible.
The childlike details are what make the finished craft so special.
Step 5: Add Stems and Curly Vines

Finally, use a green marker to draw a short stem at the top of each pumpkin.
Then add a few curly green vines extending from either side.
Children can make their vines short, long, curly, or wiggly.
This final step really helps transform the orange apple stamps into adorable little pumpkins!
Once everything is finished, your apple stamped jack-o-lantern craft is ready to display.
Tips for Making This Craft With Preschoolers
This Halloween painting activity is especially well suited for preschool and kindergarten classrooms.
Here are a few suggestions to help everything go smoothly.
Prepare the apples ahead of time. Cutting the apples before children arrive makes the activity easier to manage. Adults should handle all knife work.
Use shallow paint trays. A thin, even layer of paint produces better stamps than dipping the apple into a thick puddle.
Practice stamping first. Let children make one or two test prints on scrap paper before working on their final craft.
Give children plenty of space. Larger sheets of cardstock make it easier for little hands to stamp without overlapping pumpkins.
Let the paint dry completely. Drawing on wet paint can cause the markers to smear or become clogged.
Embrace imperfect results. Some apple stamps will be uneven, some will have missing sections, and others will look a little messy. That’s part of the charm!
If you’re making this with a large group, consider splitting the activity into two sessions: stamping the pumpkins on the first day and decorating them once they’re dry.
Educational Benefits of Apple Stamping

Although this looks like a simple Halloween art project, there are plenty of opportunities for learning.
Fine Motor Development
Gripping an apple, dipping it into paint, and pressing it onto paper all encourage hand strength and coordination.
Later, using markers to add small facial features and curly vines provides additional opportunities to practice controlled hand movements.
These are important foundational skills for early writing.
Creative Expression
Instead of following a rigid template, children get to decide what their jack-o-lanterns will look like.
They can experiment with different expressions, shapes, and designs.
This encourages independent thinking and gives children ownership over their artwork.
Hand-Eye Coordination
Stamping requires children to carefully position the apple before pressing it onto the paper.
They also practice controlling how much pressure they apply and where each stamp is placed.
Early Math Skills
This craft can easily become a simple counting activity.
Ask children to count how many pumpkins they’ve stamped, compare the number of happy and spooky faces, or identify which pumpkins are bigger or smaller.
You can even invite children to create a specific number of pumpkins for extra counting practice.
Social-Emotional Learning
Drawing different jack-o-lantern expressions is a fun way to explore feelings.
Ask questions like:
- Which pumpkin looks happy?
- Can you make a surprised pumpkin?
- What would an angry jack-o-lantern look like?
- Can you draw a pumpkin that looks sleepy?
These little conversations help children recognize and describe different emotions.
For another fun activity that explores feelings, take a look at our Crayon Box Feelings Name Craft.
Fun Variations to Try
There are plenty of ways to adapt this apple stamped Halloween craft.
Create a pumpkin patch: Stamp lots of pumpkins across a large sheet of paper and use green markers to connect them with vines.
Experiment with paint colors: Try mixing yellow and orange paint to create pumpkins with different shades.
Make an emotions activity: Challenge children to draw a different facial expression on each pumpkin.
Practice counting: Ask children to stamp a specific number of pumpkins, then count them together.
Make Halloween cards: Use smaller pieces of folded cardstock to create handmade Halloween greeting cards for family members.
Create a classroom bulletin board: Have each child stamp and decorate their own pumpkins, then display them together as a cheerful Halloween pumpkin patch.
Halloween Books to Pair With This Craft

I love pairing seasonal crafts with picture books, especially when the activity is being used in a preschool or kindergarten classroom.
Reading a pumpkin-themed story before crafting is a wonderful way to build excitement and introduce new vocabulary.
Here are six books that pair beautifully with this apple stamped jack-o-lantern craft.
1. It’s Pumpkin Day, Mouse! by Laura Numeroff – Mouse decorates pumpkins with different facial expressions in this adorable Halloween story. This is probably my favorite pairing for this particular craft because children can recreate the different pumpkin faces using their apple stamps.

2. The Biggest Pumpkin Ever by Steven Kroll – Two mice discover the same pumpkin and have very different plans for it in this sweet autumn story. A fun choice for introducing pumpkin-themed art and talking about how pumpkins grow.


3. Pumpkin Jack by Will Hubbell – This beautifully illustrated story follows a jack-o-lantern through the seasons as it decomposes and eventually grows into a new pumpkin plant. It’s a wonderful way to combine Halloween crafting with a simple science lesson.

4. How Many Seeds in a Pumpkin? by Margaret McNamara – A classroom investigates how many seeds are hiding inside different pumpkins in this engaging story about counting, estimation, and discovery. Pair it with a pumpkin counting activity after crafting.

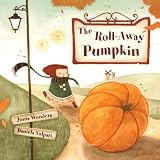
5. The Roll-Away Pumpkin by Junia Wonders – A runaway pumpkin sends a little girl on a lively adventure in this colorful fall story. It’s a fun read-aloud for younger children and a great way to introduce pumpkin vocabulary.
6. The Little Old Lady Who Was Not Afraid of Anything by Linda Williams – This interactive Halloween favorite is full of repetition, movement, and just the right amount of spooky fun. It’s a wonderful read-aloud for preschoolers and kindergarteners who enjoy playful Halloween stories.

My favorite pairing: It’s Pumpkin Day, Mouse! is an especially good match because both the book and the craft focus on creating pumpkins with different expressions.
More Easy Halloween Crafts for Kids
If your kids enjoyed making these apple stamped jack-o-lanterns, here are some other fun Halloween crafts and activities to try next!
Paint Splat Ghost Craft

Kids use white paint and a straw to create silly little ghosts on black cardstock. This paint splate ghost craft is another fun Halloween painting activity that encourages experimentation and creativity.
Paint Splat Monsters

Turn colorful paint splats into adorable paint splate monsters! This easy process art activity is perfect for preschoolers who love getting creative with paint.
Fork Painted Frankenstein Craft

Use a fork + paint to paint Frankenstein’s wild hair in this fun Halloween craft that combines painting, coloring, and fine motor practice.
Fork Painted Witch Craft

Kids use a fork to create colorful witch hair before adding a paper hat. This fork painted witch craft is a fun and easy Halloween craft using our free printable template.
Paper Plate Pumpkin Craft

This adorable torn paper pumpkin craft uses torn paper and a small paper plate to create a festive jack-o-lantern. It’s another wonderful choice for strengthening fine motor skills.
Halloween Suncatchers

Brighten up your classroom or home windows with colorful Halloween suncatchers. These are especially fun to display where the sunlight can shine through.
Halloween Name Crafts

Looking for a Halloween activity that also builds name recognition? Our collection of Halloween name crafts includes lots of fun options for preschool and kindergarten children.
You can also explore our complete collection of October crafts and activities for kids for even more seasonal inspiration.
Frequently Asked Questions
What kind of apple works best for apple stamping?
A small, firm apple works best for this craft. Smaller apples are easier for preschoolers to grip and create pumpkin prints that fit nicely on a sheet of cardstock.
What paint should I use for apple stamping?
Washable tempera paint is a great choice for young children. It produces colorful prints, is easy to use, and is generally easier to clean up than permanent paints.
Can toddlers make this craft?
Yes, with adult supervision! Toddlers can enjoy stamping the apple into paint and pressing it onto paper. An adult can help add the jack-o-lantern details afterward. Make sure the apple pieces and materials are handled safely and aren’t put into mouths.
Do I need a printable template?
No! That’s one of the best things about this activity. The apple creates the pumpkin shape, so there’s no need to print, trace, or cut out a template.
Can I use regular printer paper?
You can, but cardstock works much better because it is thicker and less likely to wrinkle or tear when wet paint is applied.
How long does this craft take?
The stamping portion usually takes around 10–15 minutes, depending on the child’s age and how many pumpkins they make. You’ll also need to allow time for the paint to dry before decorating the pumpkins with markers.
Final Thoughts
This apple stamped jack-o-lantern craft is such a fun way to turn an ordinary apple into a creative Halloween art activity.
With just a little orange paint, cardstock, and a few markers, kids can create an entire collection of silly, spooky, and happy pumpkins.
I especially love that each jack-o-lantern turns out completely different. The imperfect apple prints and hand-drawn faces give this craft so much personality!
Whether you’re planning a preschool Halloween party, setting up a kindergarten art center, or looking for an easy Halloween activity to make at home, I hope your little ones have as much fun making these pumpkins as we did.
For more simple, screen-free crafts and activities, be sure to follow This Tiny Blue House on Pinterest and join our Screen Free Activities & Crafts for Kids Facebook group. We’d love to have you!
Happy crafting! 🎃
